
Bonnie in Closing Shift: How He Hunts and What to Do When He's Near
Bonnie is one of Closing Shift's animatronic hunters. He can hear you on voice chat, closets and vents are your answer when he's near, and one recorded escape hid out in a bathroom stall and still found the fourth key.
Quick answer
Bonnie is one of Closing Shift's animatronic hunters, and the answer when he is near is short: get into a closet or crawl through the vents, and keep in mind that he can hear you over voice chat. Hiding is not a wasted turn either — one recorded escape rode out a Bonnie scare in a bathroom stall and still walked away with the fourth key.
- Bonnie's own hunting rule is not described in the game's listing, so plan around the general hunter counterplay rather than a memorised pattern.
- The closet-and-vent advice is written word for word for Freddy and Chica too, so it is shared counterplay, not a Bonnie-only weakness.
- Getting caught shows CAUGHT or SEIZED on screen, then you respawn and continue at the cost of extra lives.
Who Bonnie is
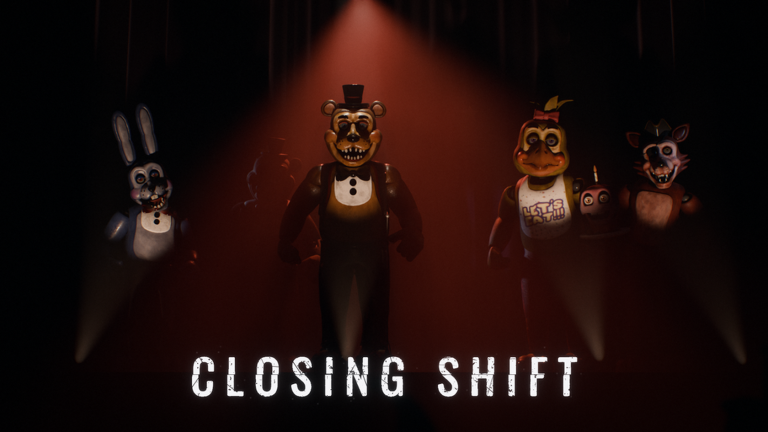
Bonnie is part of Closing Shift's animatronic cast, listed alongside the rest of the hunters. The game's own listing gives him a single entry: he hunts by his own rules, the description does not spell those rules out, he can hear you over voice chat, and you should hide in a closet or crawl through the vents when he is near.
That is a thin brief, and it shapes how you should treat him. The game's listing does not say which rooms Bonnie favours, what draws him to you, or what he will do once he has noticed you — his entry openly declines to explain his rules. What you are given instead is a working answer to the only question that matters in the moment: he is close, so get into a hiding spot or get into the vents.
There is one distinction worth keeping straight, because it changes what the advice means. The same three sentences — hunts by its own rules, hears you over voice chat, hide in a closet or crawl through the vents — appear word for word under Freddy and Chica. So the closet/vent instruction is the game's shared hunter counterplay, not a Bonnie-specific exploit, and it does not tell you how Bonnie differs from the rest of the cast. Treat it as the reliable default while you learn how he actually behaves, rather than as proof that Bonnie is uniquely vulnerable to closets.
What to do when he is near
Checklist
- Hide in a closet
The listing's first answer for Bonnie being near. Closets are enclosed hiding spots, and the reviewed playthrough also shows a bathroom stall used the same way when Bonnie turned up.
- Or crawl through the vents
The alternative the listing gives alongside closets. Vents run through the building and are a route out of the open when hiding is not practical.
- Keep voice chat in mind
Bonnie can hear you over voice chat. The listing does not describe what he does with what he hears, so treat an open mic as reachable by him rather than as private.
- Do not assume the shotgun settles it
A close-range shotgun blast did repel a rabbit animatronic in one recorded chase, but the material does not show that rabbit was Bonnie, so shooting is not a confirmed Bonnie counter.
The first two items are the listing's own words, and together they cover both sides of the same idea: put something solid between you and Bonnie, or leave the area entirely through a route he is not using. Closets and stalls are the enclosed options — the kind of hiding spot where you are out of the room rather than behind a door in it. Vents are the movement option, letting you relocate instead of waiting him out.
The voice chat line is the part players tend to gloss over. Bonnie can hear you over voice chat, which makes an open microphone a channel he has access to. The listing stops there: it does not say whether he changes course because of it or simply notices, and it does not describe any sound meter. Because of that, the safe way to read the line is that voice chat is a thing Bonnie can use, not an invisible layer of the game.
The rest of the survival toolkit in the same playthrough is worth knowing, with one caveat. Barricading a door with a chair — hold E, and the game shows BARRICADING as the prompt fills — is the game's other way of putting something between you and a hunter, and it is used repeatedly during that run. That said, the footage does not show a barricade placed specifically against Bonnie, so keep barricading filed as part of the same toolkit rather than as a documented Bonnie counter. The close-range shotgun repelling a rabbit animatronic has the same limit: real as an observed action in the run, but not tied to Bonnie specifically.
What a Bonnie scare actually costs you
Hiding reads as a defensive, time-losing move, and the recorded playthrough is a useful correction. In it, the player was still working through the four keys when Bonnie appeared, and dropped into a bathroom stall to stay out of his way. During the same window, the freezer got unlocked with a key, the key counter reported "A key. 4 of 4." and moved to KEYS 4/4, and the objective changed to "FIND THE REST OF THE CODE". The player survived the encounter and carried on escaping.
The relationship is the useful part: a Bonnie sighting interrupted the search, but it did not reset the run or cost the objective. The key hunt continued around it, and the last key landed in the same stretch. So when Bonnie forces you out of a room, the question to ask is what you can still accomplish from cover — read the objective text, watch for a key counter change, and keep the next step in view — rather than how fast you can get back to what you were doing.
What the record does not show is why the stall worked. It is one player's action in one encounter, and the footage does not explain whether Bonnie lost track of them, never entered the bathroom, or was simply moving elsewhere. Do not read it as a tuned rule about Bonnie's line of sight or as proof that any bathroom stall is a guaranteed safe spot.
If a hunter catches you
A catch is recoverable. The screen shows CAUGHT or SEIZED, after which the player respawns and can continue, at the cost of extra lives. In the reviewed playthrough those texts appear with a Birthday Bear jump scare and a Vintage Freddy jump scare, and play continues after the extra lives are spent. The same footage does not include Bonnie catching the player, so do not lock in a specific message for a Bonnie grab — watch for the full-screen text and the respawn, and be aware that lives are the currency being deducted.
Where Bonnie sits in the escape
Bonnie is an obstacle inside a longer task rather than a fight of his own. In the run above he interrupts you mid-way through gathering the four keys, before the four-digit code becomes the objective. In the recorded run the encounter happened while the key hunt was still running, and the objective switched to the code hunt in the same window.
If you want the shared counterplay in more detail, the enclosed hiding spots are covered in the closet guide, the other exit route in the vents guide, and the door tool in the barricade guide. The voice chat side of Bonnie's entry is worth reading alongside the voice chat guide, since an open mic is the one thing in his description that involves you doing something. For the broader picture of how the hunters differ, the animatronic behaviour guide and the characters list put Bonnie next to Freddy and Chica, whose entries carry the same closet-and-vent line.
Short version: Bonnie is a hunter with an unwritten rulebook. When he is near, break line of sight in a closet or a stall, or take the vents out of the area, and keep your voice chat in mind while you do it.
Related Guides
Closet Hiding: When It Works
Hide when Freddy, Bonnie or Chica comes near, note the Foxy exception and know when to leave.
Vents: Crawl to Dodge Hunters
Learn when crawling through ducts beats hiding or barricading and which hunters the vents avoid.
Characters List: Hunters and Helper
Meet Freddy, Bonnie, Chica, Foxy, Golden Freddy, Fredbear and the Puppet with each encounter response.