
Closing Shift Roblox Camera Guide: Find the Terminal and Read the Feeds
Where the security cameras are in Closing Shift, how the terminal in the B-2 security/safe room switches feeds, what the feeds show, and what the Puppet at the desk can help with.
The security cameras in Closing Shift are a look at the restaurant while you are somewhere else in it. You get to them through the security terminal in the security/safe room on B-2 — the room the elevator opens into at the start of the shift. That terminal is what switches the camera feeds, and the feeds are worth watching for what is moving through the building.
Quick answer
Reach the B-2 security/safe room, use the security terminal there to switch camera feeds, and watch the feeds for movement through the restaurant. The Puppet at the same security desk offers a Q&A help menu.
- The terminal sits in the security/safe room the elevator opens onto at B-2.
- Feeds are switched at that terminal, not from a separate room.
- The band still performs on the cameras, so expect the mascots on stage.
- Ask the Puppet at the security desk — the game's own guidance pairs that with watching the cameras.
Reaching the camera terminal at the start of a shift
The elevator carries you down from the surface and opens into a security/safe room. That room holds the two things this page is about: the security terminal used to switch camera feeds, and the gift box. Open the box and the Puppet appears and offers a Q&A help menu, in the same room as the terminal.
Because you arrive in that room straight off the elevator, the camera terminal is in front of you before the rest of the shift's exploration begins. Nothing in the room has to be earned first — you exit the elevator into it, and the feeds are already attached to the terminal there. Once you have left the room and are out among the corridors, party rooms and vents, the feeds become your only view of the parts of the building you are not standing in.
What the feeds show you
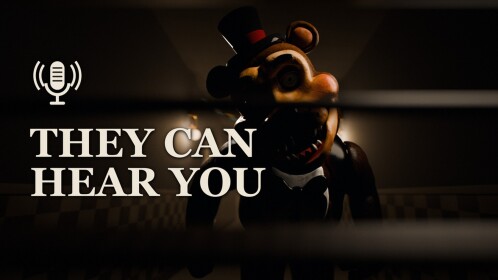
The official description of Closing Shift says the band still performs on the cameras, so a feed can put the animatronic mascots on stage. Expect the band as part of the stage view rather than an idle, empty room; it is one of the fixed things the cameras give you.
The other guidance around the cameras treats them as a movement tracker. Watching them is how you keep track of what is moving through the building, and of what is moving near you. Read the two pieces together: the feeds give you a picture of movement in the restaurant, and the band is a visible, permanent part of that picture on stage. That is the useful expectation to carry in — the camera system answers "what is moving," not "what should I do about it."
The Puppet at the security desk
The Puppet stands at the security desk and can help you. The official description puts it in the same breath as the cameras: ask the Puppet at the security desk for help, and watch the cameras. At the start of a shift, opening the gift box in the security/safe room is what brings the Puppet out, and it offers a Q&A help menu at that point.
In practice the two tools sit together at the same desk. The terminal changes what you are looking at; the Puppet's Q&A menu is where you ask the questions the shift throws at you. If you are unsure what a camera view is telling you or what the shift expects next, the menu is right there next to the terminal, so you do not have to leave the room to use it.
Cameras are one part of the survival kit
Cameras do not replace the rest of the game's survival tools — the official material lists hiding in closets, crawling the vents, and barricading doors as separate actions, and doors you barricade can be kicked in. The feed tells you something is moving; how you deal with what moves is handled by those other systems, which have their own guides.
That division is worth holding onto. Checking a feed is a quick way to see the building, but the answer to a threat on the move is a closet, a vent or a barricade, not the monitor itself. Treat the terminal as the place you confirm what is happening, and the other tools as the place you act on it.
Related guides
- The full walkthrough follows a complete shift from the elevator down to B-2 onward.
- The map and locations page helps you place what the feeds show.
- The four keys and the four-digit code are the shift's main objectives; see four keys locations and the four-digit code.
- When you are ready to escape, the steps are covered in how to call the elevator.
- For broader survival context around watching and being watched, see the survival guide.
The short version: the security cameras are reached by walking into the room the game gives them to you in — the B-2 security/safe room — and switched at the terminal there. Watch the feeds to track movement through the building, expect to see the band still performing on stage, and lean on the Puppet's Q&A menu at the same desk if you need help with what the shift asks of you next.
Related Guides
Puppet: Location and Help
Open the B-2 gift box, ask the Puppet at the security desk for help and use its Q&A menu.
Survival Guide: Counter Each Encounter
Use closets, vents, barricades, Foxy's light rule and voice chat when an animatronic finds you.
Map and Restaurant Locations
Map both levels, from the B-2 safe room to the corridors and rooms holding keys and code notes.